What Are the Main Reasons Windshields Need Replacing?
Written by craig braddick

Why Is My Windshield Rattling?

A rattling windshield can be caused by several issues. Here’s a breakdown of common causes and how to address them:

1. Loose Windshield or Poor Installation

  • Cause: The adhesive or sealant holding the windshield in place may have deteriorated, or the windshield wasn’t installed correctly.
  • Symptoms: The rattle intensifies when driving over bumps or at high speeds.
  • Solution:
    • Inspect the seal around the windshield.
    • If it looks damaged, take the vehicle to a professional for resealing or reinstalling the windshield.

2. Worn Weatherstripping or Gasket

  • Cause: The rubber weatherstripping around the windshield may be loose, cracked, or missing.
  • Symptoms: The rattle may be more pronounced in windy conditions or when the car vibrates.
  • Solution:
    • Check the condition of the weatherstripping.
    • Replace damaged or loose gaskets. You can purchase a replacement kit or have it repaired professionally.

3. Loose or Missing Clips or Fasteners

  • Cause: Windshield trim or clips securing the windshield might be loose or broken.
  • Symptoms: The rattle comes from the edges of the windshield.
  • Solution:
    • Inspect the trim and clips.
    • Replace broken or missing clips. This is often a simple fix that you can do yourself.

4. Structural Issues in the Vehicle Frame

  • Cause: Damage to the frame or body of the vehicle near the windshield can cause movement or gaps.
  • Symptoms: The rattle may coincide with visible gaps or misalignment near the windshield.
  • Solution:
    • Have a mechanic inspect for structural issues, especially if the car has been in an accident.

5. Debris in the Seal

  • Cause: Dirt, leaves, or debris caught between the windshield and the frame can create gaps and vibrations.
  • Symptoms: The rattle may worsen after driving through debris or in windy conditions.
  • Solution:
    • Clean the area around the windshield thoroughly with a brush or compressed air.

6. Loose Interior Components

  • Cause: Interior components near the windshield, like the dashboard or sun visor, might be the source of the noise.
  • Symptoms: The rattle seems to come from inside the car, especially near the dashboard.
  • Solution:
    • Check and tighten any loose screws or panels on the dashboard or interior trim.

7. Temperature or Environmental Factors

  • Cause: Extreme temperature changes can cause the windshield or its components to expand and contract, loosening the seal.
  • Symptoms: The rattle is seasonal or occurs after rapid temperature changes.
  • Solution:
    • If the seal appears intact, monitor the situation. For persistent issues, resealing may be required.

8. Windshield Damage

  • Cause: Cracks or chips in the windshield can cause vibrations and rattling.
  • Symptoms: Visible damage on the windshield, often accompanied by the noise.
  • Solution:
    • Repair chips or cracks promptly. If the damage is extensive, the windshield may need replacement.

Here’s how to inspect and address the potential causes of your rattling windshield step by step. You can do many of these checks yourself before seeking professional help.


Inspection Steps

1. Check the Windshield Seal

  • What to Look For:
    • Gaps or looseness between the windshield and the car’s frame.
    • Signs of dried-out or cracked sealant.
  • How to Inspect:
    • Run your fingers along the edge of the windshield.
    • Gently push the glass; if it moves, the seal may be compromised.

2. Inspect the Weatherstripping

  • What to Look For:
    • Torn, cracked, or missing rubber around the windshield.
  • How to Inspect:
    • Look closely at the rubber weatherstripping.
    • Use a flashlight to check for gaps or damage.

3. Examine the Trim and Clips

  • What to Look For:
    • Loose, bent, or missing trim pieces around the windshield.
    • Loose clips holding the trim in place.
  • How to Inspect:
    • Tap gently on the trim; a rattling sound may indicate loose parts.

4. Check for Debris

  • What to Look For:
    • Leaves, dirt, or small objects trapped between the windshield and the frame.
  • How to Inspect:
    • Use a small brush or compressed air to clear debris.

5. Test for Interior Rattles

  • What to Look For:
    • Loose dashboard panels or other components vibrating near the windshield.
  • How to Inspect:
    • Drive on a bumpy road and press on dashboard panels or trim pieces to see if the rattle changes.

6. Inspect for Structural Issues or Damage

  • What to Look For:
    • Warping or visible damage to the car’s frame around the windshield.
  • How to Inspect:
    • Look for misalignment or signs of rust or bending near the windshield edges.

7. Check for Windshield Damage

  • What to Look For:
    • Chips or cracks in the windshield itself.
  • How to Inspect:
    • Shine a light across the windshield at an angle to reveal small cracks or chips.

DIY Fixes for Common Issues

1. Resealing the Windshield

  • Use a urethane-based windshield sealant (available at auto parts stores).
  • Apply the sealant in any visible gaps along the windshield edges.

2. Replace Weatherstripping

  • Purchase a universal weatherstripping kit if the original is damaged.
  • Remove old weatherstripping, clean the surface, and attach the new rubber strip.

3. Tighten or Replace Trim Clips

  • Remove and inspect the trim. If clips are loose or broken, replace them with new ones.
  • Ensure the trim is securely snapped back into place.

4. Clean and Clear Debris

  • Use a small brush or vacuum to remove dirt. Compressed air can help for hard-to-reach areas.

5. Temporary Interior Fixes

  • Use adhesive foam strips to cushion any loose dashboard or trim components.

When to Seek Professional Help

  1. If the Windshield Moves When Pushed:
    • Movement indicates the seal is compromised, and the windshield may need professional resealing or replacement.
  2. If Damage Is Found:
    • Chips or cracks larger than a quarter inch should be repaired or replaced by a professional.
  3. Persistent Rattling After DIY Fixes:
    • If the noise persists, take the car to an auto glass specialist or mechanic.

T&S Auto Glass Offers Replacement Sunroofs and Moonroofs in Chandler

When you’re looking for the best windshield repair & replacement in Phoenix, T&S Auto Glass is here to help!  We offer mobile windshield repair anywhere in the Phoenix Valley for your convenience and at our shop in Chandler, AZ.  If you’ve got a cracked windshield, chipped windshield, or need any other type of auto glass repair service call our friendly and professional team.

How To Fix A Leaking Windshield
Written by craig braddick

Fixing A Leaky Windshield

How To Fix A Leaking Windshield

Windshield leaks can often be repaired without needing a full windshield replacement, especially if they are minor and caught early. Here’s how to address a windshield leak:

1. Identify the Leak Source

  • Water Test: Pour water over the windshield edges and check from the inside for any water seeping through. Have someone sit inside the car to observe, or look for moisture yourself.
  • Inspect the Seal: Sometimes the leak is due to a broken or worn-out seal around the windshield. Look for cracks or gaps in the sealant.

2. Clean the Area Around the Leak

  • Clean around the leaky area on the windshield’s exterior to ensure the adhesive or sealant will bond well. Remove any dirt, old adhesive, or other debris with a non-abrasive cleaner.

3. Use Windshield Sealant or Silicone Caulk

  • Windshield Sealant: You can use a clear, flowable windshield sealant, typically available at auto parts stores. Apply it to the gap or crack around the windshield edge. This type of sealant is designed specifically to fill small gaps and cracks.
  • Silicone Caulk: In some cases, automotive-grade silicone caulk can be applied to the leaky area. Just be cautious with the application, as this product is more permanent and can be harder to remove later.

4. Apply and Smooth the Sealant

  • Carefully apply the sealant to the affected area using a caulk gun or applicator. Smooth it with a gloved finger or tool to ensure a tight seal, and let it cure according to the product’s instructions (typically 24 hours).

5. Test for Leaks Again

  • Once the sealant is fully cured, repeat the water test to check for any remaining leaks. If water still seeps through, the leak may be in another area, or the adhesive application might need reinforcement.

If the leak persists despite these steps, it’s possible the entire seal is compromised, which may require a professional to remove and reseal or replace the windshield entirely.

hips, cracks, or damage to the windshield promptly. Regularly inspect the windshield and surrounding seals for signs of wear or damage, and address any issues promptly to prevent leaks from occurring.

Windshield Leak Repair

If you live or work in the Chandler, Tempe, or anywhere in the Phoenix Valley and have a leaky windshield we can help!  Leaking windows are annoying and it also can ding the value of a vehicle if the interior is ruined by mold or rust. Preserve the value of your car, truck, or suv by allowing T&S Auto Glass to provide reliable leaky windshield repair. To find out more about our windshield repair services or schedule an appointment please give us a call today! Schedule Windshield Leak Repair Today 480-345-0990 /602-667-3030 /623-878-5566

Mobile Windshield Replacement In Chandler: What To Expect Before Your Appointment
Written by craig braddick

Is Windshield Tape Needed?

Yes, windshield tape can be important if you’ve recently had a windshield replacement. The tape, typically applied around the edges of the windshield, helps hold it in place and prevents it from shifting or coming loose before the adhesive fully cures. Here’s why it can be essential:

1. Stabilizes the Windshield During Curing

  • Windshield adhesives need time to fully cure, typically 24–48 hours, depending on the adhesive type and weather conditions. The tape holds the windshield securely, minimizing any movement that might affect the seal.

2. Prevents Air and Water Leaks

  • Properly securing the windshield prevents gaps and ensures that the adhesive forms a tight seal. Without tape, even a minor shift could create leaks, allowing air or water to enter the vehicle.

3. Protects Against Road Vibrations and Impact

  • Driving over rough surfaces or uneven roads can cause vibrations that may shift the windshield slightly if it’s not fully set. The tape helps absorb some of these vibrations, preventing the windshield from moving.

Tips for Using Windshield Tape:

  • Leave It On for 24–48 Hours: Don’t remove the tape prematurely to allow for complete curing.
  • Avoid Car Washes and Excessive Pressure: High-pressure water or strong winds can disturb the curing adhesive.
  • Be Gentle with Your Car Doors: Slamming doors can cause vibrations that may disrupt the adhesive setting.

Hotter Weather Vs Cold Conditions

When it comes to weather in Arizona, typically it is dry weather. Usually In good safe conditions to have the adhesive settle quicker than usual. Although play it safe and wait up to at least 24 hours.

In the situation where you are in colder climates typically wait upwards to around 72 hours for the adhesive to settle on your windshield. This is an important part of the process of getting your new windshield installed. Patience is a virtue so just wait and the adhesive will settle properly in the allotted time.

Avoid Having A Car Wash

While tape is still actively working its magic on your vehicle, do not take your vehicle through a car wash. Especially higher pressured car washes, these tend to cause more damage than good during this process. This will be due to the high-pressure washing system to force your glue to peel off or away which in short makes you head back to your shop to have the problem resolved yet again. On the other hand, you can easily choose to manually wash your car, and this shouldn’t cause any damages to your vehicle.


What Are the Main Reasons Windshields Need Replacing?
Written by craig braddick

Why Do Windshields Get Pitted?

Windshields can become pitted due to various factors, often related to exposure and impact. Here’s a detailed look at why this happens:

. Debris Impact

  • Road Debris: Small rocks, gravel, and other debris kicked up by vehicles can hit the windshield at high speeds. Over time, repeated impacts can cause small pits or dings on the glass surface.
  • Sand and Dust: In areas with frequent sandstorms or high winds, sand and dust particles can cause abrasion on the windshield, leading to pitting.

2. Environmental Factors

  • UV Exposure: Prolonged exposure to sunlight can degrade the windshield’s surface over time, making it more susceptible to damage.
  • Extreme Temperatures: Fluctuations between extreme hot and cold temperatures can cause the glass to expand and contract. This can make the windshield more prone to cracking and pitting.

3. Wiper Blades

  • Worn Wipers: Old or damaged wiper blades can become abrasive and scratch the surface of the windshield, leading to pitting over time.
  • Debris on Wipers: Small particles trapped between the wiper blades and the windshield can also cause scratches and pits.

4. Chemical Exposure

  • Acid Rain: Rain that contains pollutants can be corrosive to the windshield, leading to surface damage and pitting.
  • Cleaning Products: Some harsh cleaning products can degrade the glass over time, making it more susceptible to pitting.

5. Wear and Tear

  • Age of the Windshield: Older windshields can naturally become more vulnerable to damage as the glass surface wears down over time.
  • Regular Use: Frequent use and exposure to the elements can lead to gradual pitting.

6. Improper Maintenance

  • Improper Cleaning: Using abrasive cleaning materials or techniques can scratch and pit the windshield surface.
  • Neglecting Repairs: Small chips or cracks that are left untreated can worsen and contribute to overall windshield degradation, including pitting.

Preventive Measures

  • Regular Cleaning: Use non-abrasive cleaners and soft cloths to clean your windshield. Avoid using harsh chemicals or scrubbing aggressively.
  • Wiper Maintenance: Replace wiper blades regularly and ensure they are in good condition. Clean the windshield and wipers frequently to remove debris.
  • Protective Measures: In areas prone to road debris, consider using windshield protectors or films to reduce impact damage.

Addressing minor damage early can help prevent further issues and preserve the condition of your windshield.

T&S Auto Glass Offers Replacement Sunroofs and Moonroofs in Chandler

When you’re looking for the best windshield repair & replacement in Phoenix, T&S Auto Glass is here to help!  We offer mobile windshield repair anywhere in the Phoenix Valley for your convenience and at our shop in Chandler, AZ.  If you’ve got a cracked windshield, chipped windshield, or need any other type of auto glass repair service call our friendly and professional team.

Is Your Sunroof Glass Damaged or Is Something Else Leaking?
Written by craig braddick

Adding a Moonroof To A Car

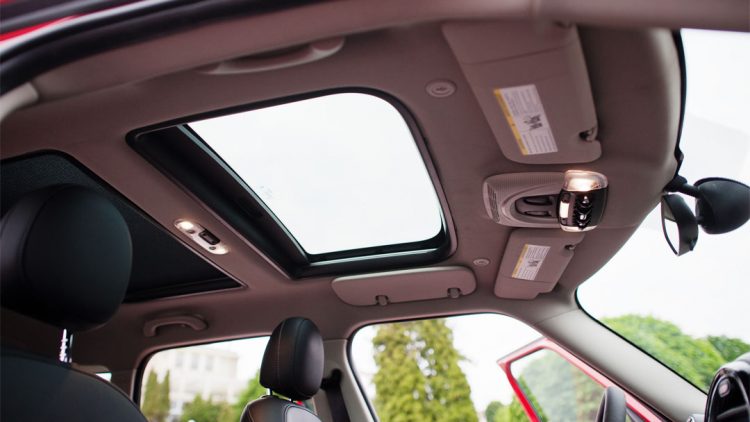
Yes, it is possible to add a moonroof (also known as a sunroof) to a car, but it involves several considerations and steps:

1. Consult a Professional

  • Choose a Reputable Installer: It’s crucial to work with a professional who specializes in installing moonroofs. This ensures that the installation is done correctly and safely.
  • Compatibility Check: The installer will need to check if your car model is compatible with aftermarket moonroof installation. Some cars may have structural or design constraints that make installation more challenging.

2. Types of Moonroofs

  • Pop-Up: Simple, manual operation; less common for aftermarket installations.
  • Sliding: The most common type; opens by sliding back into the roof.
  • Panoramic: Large, often covering a significant portion of the roof; typically more complex to install.

3. Installation Process

  • Cutting the Roof: The installer will need to cut an opening in the roof of your vehicle. This process requires precision to avoid damaging the car’s structure or existing features.
  • Installing the Frame: A frame or mounting system is installed to hold the moonroof in place. This frame needs to be sealed properly to prevent leaks.
  • Fitting the Glass: The moonroof glass or panel is installed into the frame. It must be aligned and sealed correctly.
  • Electrical Work: If your moonroof has electrical controls (e.g., for automatic opening/closing), the installer will need to connect these to your vehicle’s electrical system.

4. Considerations

  • Warranty Impact: Adding a moonroof could affect your car’s warranty, especially if the installation is done by a third party. Check with your car manufacturer or dealer.
  • Resale Value: Consider how adding a moonroof might impact the resale value of your car. While some buyers may see it as a desirable feature, others might view it as a modification that affects the car’s originality.
  • Cost: The cost of adding a moonroof varies based on the type of moonroof and your vehicle. On average, it can range from $1,000 to $3,000 or more. This includes the cost of the moonroof unit and installation labor.

5. Maintenance

  • Regular Inspection: After installation, have the moonroof checked regularly for leaks or any operational issues.
  • Cleaning: Clean the moonroof glass and surrounding areas to maintain clarity and functionality.

Adding a moonroof can enhance the comfort and appeal of your car, but it’s important to ensure that the installation is done properly to avoid potential issues.

Sunroof and Moonroof Repair & Replacement In Phoenix & Chandler

If you have a damaged sunroof or moonroof T&S Auto Glass can help you fix it for little to no cost to you.  Arizona drivers that have full coverage car insurance many times are able to get free sunroof and moonroof replacement.  It’s easy to schedule a time to come to our shop for repair or we offer mobile windshield repair in Chandler or anywhere in the Phoenix Valley.  When you have a damaged sunroof or moonroof trust the pros at T&S Auto Glass.

Mobile Windshield Replacement In Chandler: What To Expect Before Your Appointment
Written by craig braddick

Removing Dry Mud From Car Windows

Removing dry mud from car windows requires some care to avoid scratching the glass. Here’s a step-by-step guide to effectively and safely clean your car windows:

Materials Needed

  • Soft-bristled brush or microfiber cloth
  • Car-safe glass cleaner
  • Water hose or spray bottle
  • Bucket of warm water
  • Mild car shampoo or dish soap
  • Squeegee
  • Towels or drying cloths

Steps to Remove Dry Mud

1. Initial Rinse

  • Use a hose or spray bottle to rinse off as much dry mud as possible from the windows. The goal is to soften the mud and remove loose particles without rubbing them into the glass.

2. Soak and Loosen the Mud

  • Fill a bucket with warm water and add a few drops of mild car shampoo or dish soap.
  • Soak a soft-bristled brush or microfiber cloth in the soapy water.
  • Gently apply the soapy water to the muddy areas on the windows, allowing it to sit for a few minutes to soften the mud further.

3. Gently Wipe Away the Mud

  • Use the soaked brush or cloth to gently wipe away the mud. Start from the top of the window and work your way down.
  • Avoid applying too much pressure to prevent scratching the glass.

4. Rinse Again

  • Rinse the windows thoroughly with clean water to remove any remaining mud and soap residue.

5. Apply Glass Cleaner

  • Spray a car-safe glass cleaner onto the windows.
  • Wipe the windows with a clean microfiber cloth or a squeegee to remove any streaks and achieve a clear finish.

6. Dry the Windows

  • Use a clean towel or drying cloth to dry the windows completely, ensuring no water spots are left behind.

Tips for Preventing Scratches

  • Always use soft materials like microfiber cloths or soft-bristled brushes when cleaning car windows.
  • Avoid using abrasive cleaners or rough sponges, as these can scratch the glass.
  • If the mud is particularly stubborn, repeat the soaking and wiping process rather than scrubbing harder.

By following these steps, you can effectively remove dry mud from your car windows without damaging the glass.

Auto Glass Repair For Work Trucks And Business Vehicles In The Phoenix Valley
Written by craig braddick

My Front Window Does Not Work

Your front window not working can be a pain. Read on to learn more.

When your front car window doesn’t work, it can be due to several reasons, including mechanical failure, electrical issues, or a problem with the window regulator. Here are some steps you can take to diagnose and possibly fix the problem:

Step-by-Step Troubleshooting Guide

1. Check the Window Lock

  • Ensure the window lock button on the driver’s door panel isn’t activated. This button prevents the windows from being operated by the passenger controls.

2. Test the Window Switch

  • Try operating the window from both the driver’s control and the passenger’s control (if applicable).
  • If neither switch works, the problem may be electrical.

3. Inspect the Fuse

  • Locate the fuse box, usually found under the dashboard or in the engine compartment.
  • Check the owner’s manual for the specific fuse related to the windows.
  • Remove the fuse and inspect it for any signs of damage or if it’s blown. Replace it if necessary.

4. Listen for Motor Noise

  • Press the window switch and listen for any noise from the window motor.
  • If you hear the motor running but the window doesn’t move, the issue might be with the window regulator or the linkage.
  • If you don’t hear any noise, the motor might be faulty.

5. Check the Wiring

  • Inspect the wiring in the door for any visible signs of damage or wear.
  • Wires can sometimes break due to the constant movement of the door.

6. Examine the Window Tracks

  • If the window is stuck, it might be off the track.
  • Remove the door panel (consult the vehicle’s manual for instructions) and check the window tracks for any obstructions or damage.

7. Test the Window Regulator

  • The window regulator is the mechanism that moves the window up and down.
  • With the door panel removed, inspect the regulator for any broken or worn parts.

8. Check the Window Motor

  • If the motor isn’t working, it may need to be replaced.
  • You can test the motor by applying direct power to it using a 12V power source. If it works, the issue might be with the wiring or switch.

Possible Solutions

1. Replace the Fuse

  • If the fuse is blown, replace it with one of the same amperage.

2. Repair or Replace the Switch

  • If the switch is faulty, you may need to replace it. This usually involves disconnecting the old switch and connecting a new one.

3. Fix the Wiring

  • Repair any damaged wires by cutting out the damaged section and soldering in a new piece of wire, or use wire connectors.

4. Adjust the Window Tracks

  • Re-align the window if it’s off-track. Ensure the tracks are clean and lubricated.

5. Replace the Regulator or Motor

  • If the window regulator or motor is faulty, they will need to be replaced. This involves removing the door panel, disconnecting the old parts, and installing the new ones.

6. Professional Assistance

  • If the issue is complex or you’re not comfortable performing the repairs yourself, it’s best to take the car to a professional mechanic or an auto repair shop.

Tools You Might Need

  • Screwdrivers
  • Pliers
  • Multimeter
  • Fuse puller
  • Replacement fuses
  • Soldering kit or wire connectors

By following these steps, you should be able to identify and fix the issue with your non-working car window. If the problem persists or seems too complicated, seeking professional help is recommended.

T&S Auto Glass Offers Rear Window Replacement In Chandler, Arizona

T&S Auto Glass Offers Rear Window Replacement in Chandler, Arizona and surrounding areas. When your vehicle’s rear window needs replacing the professionals at T&S Auto Glass are here to help you with their top quality customer service. Call us today to schedule an appointment! We also offer windshield replacement.

Mobile Windshield Replacement In Chandler: What To Expect Before Your Appointment
Written by craig braddick

Removing Water Stains From Car Windows

Removing water stains from car windows can be tricky, but here are some methods you can try:

  1. Vinegar Solution: Mix equal parts vinegar and water in a spray bottle. Spray the solution onto the water stains and let it sit for a few minutes. Then, wipe the area with a clean microfiber cloth. The acidity of the vinegar helps break down the minerals in the water stains.
  2. Rubbing Alcohol: Dampen a clean microfiber cloth with rubbing alcohol and gently rub the water stains. The alcohol helps dissolve the minerals in the stains. Wipe the area dry with another clean cloth.
  3. Glass Cleaner and Steel Wool: Spray a glass cleaner onto the water stains and let it sit for a few minutes. Then, scrub the stains with fine-grade steel wool. Be gentle to avoid scratching the glass. Rinse the area with water and dry it with a clean cloth.
  4. Baking Soda Paste: Mix baking soda with a small amount of water to form a paste. Apply the paste to the water stains and gently scrub with a soft-bristled brush or sponge. Rinse the area with water and dry it thoroughly.
  5. Commercial Glass Cleaner: If the stains are not too stubborn, you can try using a commercial glass cleaner. Spray the cleaner onto the stains and wipe the area with a clean cloth.
  6. Lemon Juice: Squeeze some lemon juice onto the water stains and let it sit for a few minutes. Then, scrub the stains with a soft-bristled brush or sponge. Lemon juice has natural acidic properties that can help break down mineral deposits.

Always test any cleaning solution on a small, inconspicuous area of the window first to ensure it doesn’t cause damage. Additionally, avoid using abrasive cleaners or tools that could scratch the glass. If the water stains persist, you may need to seek professional help.

Auto Glass Repair For Work Trucks And Business Vehicles In The Phoenix Valley
Written by craig braddick

My Rear Window Does Not Work

When the rear window of your vehicle stops working, it can be inconvenient. Here are some steps to troubleshoot the issue:

  1. Check the Fuse: The first step is to check the fuse box for a blown fuse. Locate the fuse related to the rear window in the vehicle’s fuse box and check if it’s blown. If so, replace it with a fuse of the same amperage.
  2. Test the Window Switch: If the fuse is fine, the next step is to test the rear window switch. Remove the switch panel from the door and use a multimeter to check for continuity when the switch is pressed. If there is no continuity, the switch may need to be replaced.
  3. Inspect the Wiring: Sometimes, wiring issues can cause the rear window to stop working. Inspect the wiring harness for any signs of damage or corrosion. Repair or replace any damaged wiring.
  4. Check the Window Motor: If the switch and wiring are both fine, the issue may be with the rear window motor. Test the motor by applying power directly to it using jumper wires. If the motor doesn’t work when power is applied, it may need to be replaced.
  5. Window Regulator: Finally, check the window regulator, which is the mechanism that moves the window up and down. If the regulator is damaged or worn out, it may need to be replaced.

If you’re not comfortable troubleshooting the issue yourself, it’s best to take your vehicle to a mechanic or auto electrician for diagnosis and repair.

The cost of rear window replacement can vary depending on several factors, including the make and model of the vehicle, the type of rear window (e.g., tempered glass, heated glass), any additional features (e.g., defroster), and whether you choose OEM or aftermarket replacement parts. Here are some factors to consider when estimating rear window replacement costs:

1. Type of Rear Window:

  • Tempered Glass: Most rear windows are made of tempered glass, which is designed to shatter into small, blunt pieces for safety reasons. Replacement costs for tempered glass rear windows may be lower compared to other types.
  • Heated Glass: If your vehicle’s rear window has a built-in defroster or heating element, replacement costs may be higher due to the added complexity of the installation and the cost of the heating element.

2. Make and Model of Vehicle:

  • Luxury Vehicles: Rear window replacement costs may be higher for luxury vehicles or vehicles with specialized features due to the higher cost of parts and labor.

3. OEM vs. Aftermarket Parts:

  • OEM Parts: Original equipment manufacturer (OEM) rear windows are designed to match the specifications of your vehicle and may offer better fit and quality. However, OEM parts tend to be more expensive compared to aftermarket alternatives.
  • Aftermarket Parts: Aftermarket rear windows may be more affordable but could vary in quality and fit. Some aftermarket options may offer a good balance between cost and quality.

4. Labor Costs:

  • Professional Installation: Hiring a professional auto glass technician or repair shop for rear window replacement will involve labor costs, which can vary based on the hourly rate of the shop and the complexity of the installation.

5. Additional Considerations:

  • Sealant and Adhesive: Replacement rear windows may require sealant and adhesive for proper installation. These materials may be included in the overall cost or charged separately.
  • Tinting: If your vehicle’s rear window had tinting that needs to be replaced, tinting costs may add to the total replacement cost.

Cost Estimates:

  • Average Range: Rear window replacement costs can range from $200 to $1000 or more, depending on the factors mentioned above and the specific requirements of your vehicle.
  • Specific Factors: For example, the cost of replacing a rear window on a standard vehicle with tempered glass and no additional features may range from $200 to $500, while the cost for a luxury vehicle with heated glass and OEM parts may range from $500 to $1000 or more.

For an accurate estimate, it’s recommended to consult with a reputable auto glass repair shop or technician, who can assess the damage to your rear window, recommend the appropriate replacement option, and provide a detailed cost estimate based on your vehicle’s make and model and your specific preferences.

T&S Auto Glass Offers Rear Window Replacement In Chandler, Arizona

T&S Auto Glass Offers Rear Window Replacement in Chandler, Arizona and surrounding areas. When your vehicle’s rear window needs replacing the professionals at T&S Auto Glass are here to help you with their top quality customer service. Call us today to schedule an appointment! We also offer windshield replacement.

What Should You Do When a Car Side Window Shatters in Phoenix?
Written by craig braddick

My Power Windows Have Stopped Working

When power windows stop working, it can be frustrating. Here are some steps to troubleshoot the issue:

  1. Check the Fuse: The first thing to do is check the fuse box for a blown fuse. If the fuse is blown, replace it with one of the same amperage.
  2. Test the Window Switch: If the fuse is fine, the next step is to test the window switch. You can do this by removing the switch panel from the door and using a multimeter to check for continuity when the switch is pressed. If there is no continuity, the switch may need to be replaced.
  3. Inspect the Wiring: Sometimes, wiring issues can cause power windows to stop working. Inspect the wiring harness for any signs of damage or corrosion. Repair or replace any damaged wiring.
  4. Check the Window Motor: If the switch and wiring are both fine, the issue may be with the window motor. You can test the motor by applying power directly to it using jumper wires. If the motor doesn’t work when power is applied, it may need to be replaced.
  5. Window Regulator: Finally, check the window regulator, which is the mechanism that moves the window up and down. If the regulator is damaged or worn out, it may need to be replaced.

If you’re not comfortable troubleshooting the issue yourself, it’s best to take your vehicle to a mechanic or auto electrician for diagnosis and repair.

The cost of power window repair can vary depending on several factors, including the extent of the damage, the make and model of the vehicle, the availability of replacement parts, and whether you choose to DIY or hire a professional. Here are some factors to consider when estimating power window repair costs:

1. Nature of the Problem:

  • Window Regulator: If the issue is with the window regulator, which is responsible for raising and lowering the window, repair costs can vary based on the extent of damage and whether the regulator needs to be repaired or replaced.
  • Window Motor: If the window motor is faulty, repair costs may involve replacing the motor itself. Motor replacement costs can vary depending on the make and model of the vehicle and the complexity of the installation process.
  • Window Switch: Issues with the window switch or control panel may require replacement of the switch assembly. The cost will depend on the specific part needed and whether it requires labor for installation.

2. Labor Costs:

  • DIY vs. Professional: DIY repairs may save money on labor costs, but it requires technical skill and knowledge of automotive repair. Hiring a professional mechanic or auto technician will involve labor costs, which can vary based on the hourly rate of the repair shop and the complexity of the repair.

3. Replacement Parts:

  • OEM vs. Aftermarket Parts: Original equipment manufacturer (OEM) parts may be more expensive than aftermarket alternatives but are designed to match the specifications of your vehicle. Aftermarket parts may be more affordable but could vary in quality and compatibility.

4. Additional Considerations:

  • Diagnostic Fees: Some repair shops may charge a diagnostic fee to assess the problem with your power window system. This fee is typically applied toward the total repair cost if you choose to proceed with the repair.
  • Warranty Coverage: If your vehicle is still under warranty, some or all of the repair costs may be covered by the manufacturer.

Cost Estimates:

  • Average Range: Power window repair costs can range from $100 to $500 or more, depending on the nature of the problem, replacement parts needed, and labor costs.
  • Specific Repairs: For example, the cost of replacing a window motor may range from $150 to $300, while the cost of replacing a window regulator can range from $200 to $500 or more, including parts and labor.

DIY vs. Professional Repair:

  • DIY: DIY repairs may cost less in terms of labor but require technical expertise and access to tools. Online tutorials and repair manuals can help guide you through the process.
  • Professional: Hiring a professional ensures that the repair is done correctly and may offer warranties on parts and labor, but it comes with additional labor costs.

For an accurate estimate, it’s recommended to consult with a reputable auto repair shop or mechanic, who can assess the problem with your power window system and provide a detailed cost estimate based on your vehicle’s make and model, the required repairs, and local labor rates.

T&S Auto Glass Offers Power Window Repair in Phoenix

T&S Auto Glass Offers power window repair in Phoenix, Chandler and other areas. When your power window requires replacing the professionals at T&S Auto Glass are here to help you with their top quality service. Call us today to schedule an appointment! We also offer side window replacement.

1 2 3 4 5 6 11