Replacing a Rear Windshield
Replacing a car trunk window (rear windshield or rear hatch glass) requires specialized tools and techniques to ensure a secure and watertight installation. Here’s a step-by-step guide and considerations for DIY replacement or professional help:
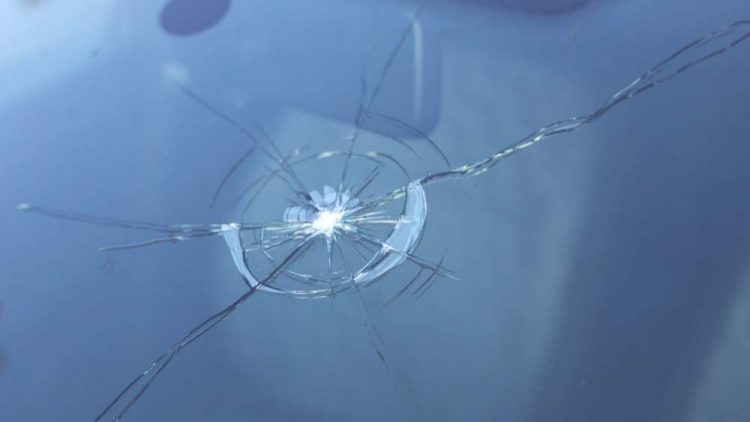
- Extensive Damage: If your windshield has significant damage, such as large cracks, deep chips, or extensive spiderwebbing, replacement may be necessary. Damage that obstructs the driver’s view or compromises the structural integrity of the windshield warrants immediate replacement.
- Damage in the Driver’s Line of Sight: Cracks or chips that are directly in the driver’s line of sight can impair visibility and pose a safety hazard. Even if the damage seems minor, it can cause distracting glare or distortions, making it difficult to see the road clearly.
- Damage Near the Edges: Chips or cracks near the edges of the windshield can weaken the structural integrity of the glass. Since the edges play a crucial role in supporting the windshield and maintaining its seal, any damage in this area can compromise the integrity of the entire windshield.
- Multiple Chips or Cracks: If your windshield has multiple chips or cracks, especially if they are close together or intersecting, it may be more cost-effective to replace the windshield rather than attempting repairs. Multiple repairs can weaken the glass and may not provide adequate protection.
- Failed Repair Attempts: If you’ve attempted to repair damage to your windshield using a DIY repair kit or professional repair service but the repair has failed or the damage has worsened, replacement may be necessary.
- Age and Wear: Over time, windshields can become worn, pitted, or scratched, which can affect visibility and reduce the structural integrity of the glass. If your windshield is old or showing signs of wear, it may be time to consider replacement for safety reasons.
- Safety Concerns: Modern windshields are designed as a critical safety component of your vehicle, providing structural support and protecting occupants in the event of a collision. If your windshield is compromised in any way, it may not provide adequate protection in the event of an accident, putting you and your passengers at risk.
- Regulatory Compliance: In some jurisdictions, there are regulations regarding the condition of vehicle windshields. If your windshield damage violates these regulations, you may be required to replace it to ensure compliance with local laws.
It’s essential to address windshield damage promptly to ensure your safety and the structural integrity of your vehicle. If you’re unsure whether your windshield needs repair or replacement, consult with a qualified auto glass professional for an assessment.
1. Decide: DIY or Professional Replacement
- DIY Replacement:
- Cost-effective if you have the necessary tools and skills.
- Best for older vehicles or simple glass installations.
- Professional Replacement:
- Necessary if your car has advanced features like defrosters, antennas, or embedded sensors in the glass.
- Ensures proper installation and prevents leaks or rattling.
2. Gather Tools and Materials
For a DIY project, you’ll need:
- Replacement Glass: Ensure it’s the correct size and model for your vehicle.
- Urethane Adhesive: Automotive-grade adhesive for securing the window.
- Caulk Gun: To apply the adhesive.
- Glass Cleaner and Primer: Prepares the surface for a strong bond.
- Gloves: Protects your hands from broken glass.
- Trim Removal Tool: To remove the old window’s moldings.
- Utility Knife or Razor Blade: To cut away old adhesive.
- Suction Cups (Optional): To lift and position the new glass safely.
3. Prepare for Removal
- Ensure Safety:
- Wear gloves and protective eyewear.
- Work in a well-ventilated area or outdoors.
- Remove Broken Glass:
- If the old window is shattered, carefully remove all glass shards using a vacuum or scraper.
- Detach Interior Panels:
- Remove any trim or panels that block access to the window frame.
- Cut Away Old Adhesive:
- Use a utility knife to remove as much of the old urethane adhesive as possible.
4. Install the New Glass
- Clean and Prime the Surface:
- Use a glass cleaner to remove debris. Apply a primer to the window frame for better adhesion.
- Apply Urethane Adhesive:
- Load the adhesive into a caulk gun and apply a continuous bead around the window frame.
- Position the New Glass:
- Use suction cups to lift and align the new glass. Press it firmly into place.
- Secure and Let It Cure:
- Use painter’s tape to hold the window in place while the adhesive cures.
- Follow the adhesive manufacturer’s instructions for curing time (usually 24–48 hours).
5. Reassemble and Test
- Reinstall Trim and Panels:
- Replace any removed interior or exterior trim pieces.
- Check for Leaks:
- After the adhesive has cured, spray water around the edges of the window to ensure there are no leaks.
- Reconnect Features:
- If your window has a defroster or antenna, ensure all connections are properly reattached.
When to Hire a Professional
- Advanced Features: Heated windows, embedded antennas, or proximity sensors.
- Insurance Coverage: Many auto insurance policies cover glass replacement, reducing out-of-pocket costs.
- Warranty: Professional services often provide warranties on their work.
Costs
- DIY: $100–$300 (replacement glass and materials).
- Professional Replacement: $200–$800 depending on the car model and features.
T&S Auto Glass Offers Replacement Windshields in Chandler
When you’re looking for the best windshield repair & replacement in Phoenix, T&S Auto Glass is here to help! We offer mobile windshield repair anywhere in the Phoenix Valley for your convenience and at our shop in Chandler, AZ. If you’ve got a cracked windshield, chipped windshield, or need any other type of auto glass repair service call our friendly and professional team.

