Power Window Repair Costs 2025
Written by craig braddick

Power Window Repair Costs 2025

Repairing a malfunctioning power window in 2025 can vary in cost based on several factors, including the specific issue, vehicle type, and regional labor rates. Here’s a detailed breakdown:

Repairing a malfunctioning power window in 2025 can vary in cost based on several factors, including the specific issue, vehicle type, and regional labor rates. Here’s a detailed breakdown:

Average Repair Costs:

  • General Range: $100 to $300.

  • Window Regulator Replacement: $613 to $700.

  • Window Lift Motor Replacement: $276 to $371 for sedans; up to $908 for luxury vehicles.

Factors Influencing Costs:

  1. Vehicle Type: Luxury or specialized vehicles often have higher repair costs due to the complexity and price of parts.

  2. Specific Component Failure: Replacing a motor may differ in cost from replacing a regulator or addressing off-track issues.

  3. Labor Rates: Local labor costs can significantly impact the total repair price.

What Causes Power Window Failure?

Power window failure can happen due to a variety of reasons, ranging from electrical issues to mechanical wear and tear. Here are some of the most common causes:

1. Window Regulator Failure

  • The regulator is the mechanism that moves the window up and down.
  • Over time, the cables or gears can wear out, snap, or get stuck.

2. Power Window Motor Burnout

  • The motor powers the regulator; if it burns out or weakens, the window may move slowly or stop working entirely.
  • Overuse, age, and exposure to moisture can contribute to motor failure.

3. Faulty Window Switch

  • If the switch is defective, it won’t send power to the motor.
  • Dirt, debris, or moisture can damage the switch contacts, preventing proper function.

4. Blown Fuse or Electrical Issues

  • A blown fuse will cut power to the window system, preventing operation.
  • Broken wiring, damaged relays, or a bad control module can also disrupt power supply.

5. Window Off Track or Jammed

  • The window may fall out of alignment due to worn-out guides or obstructions inside the door.
  • If the glass gets stuck, it can prevent movement, even if the motor and regulator are working.

6. Frozen or Stuck Windows (in Cold Weather)

  • Cold weather can cause the window seals to freeze, making it hard for the motor to move the glass.
  • Ice buildup can put extra strain on the motor, leading to burnout over time.

7. Water Damage or Corrosion

  • Moisture getting inside the door panel can corrode electrical connections, leading to power window failure.
  • Extended exposure to rain or humidity can cause rust in mechanical parts.

8. Child Lock or Window Lock Engaged

  • Some vehicles have a window lock button that disables passenger-side windows.
  • A mistakenly activated lock can make it seem like the window is broken.

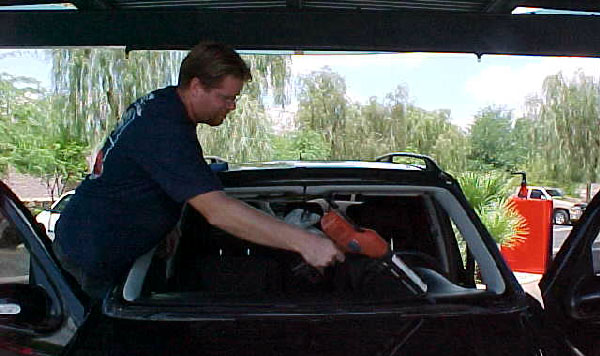
How to Troubleshoot Power Window Issues

  • Check the fuse: If all windows stop working, a blown fuse is a likely culprit.
  • Try the switch on both the driver and passenger side: If one works and the other doesn’t, the switch may be the problem.
  • Listen for motor noise: If you hear a hum but the window doesn’t move, the regulator may be broken.
  • Inspect for jams: Look for obstructions in the window track or dirt buildup.

If troubleshooting doesn’t work, a mechanic can diagnose whether it’s an electrical issue, a motor failure, or a regulator problem.

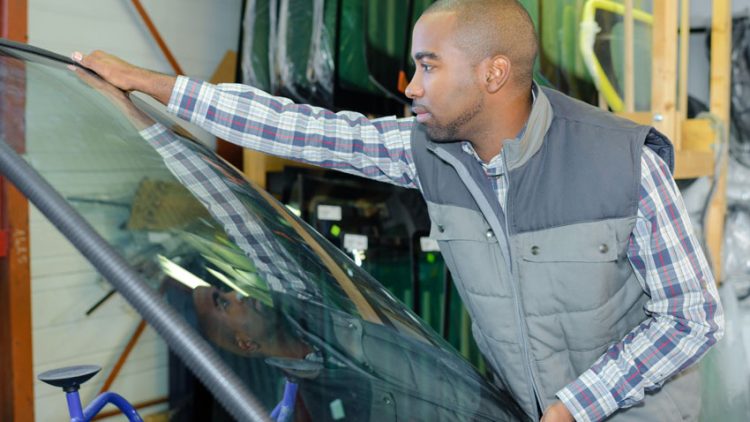
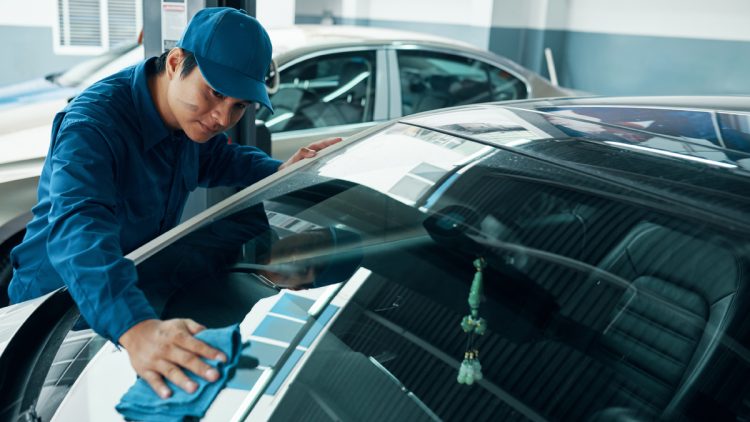
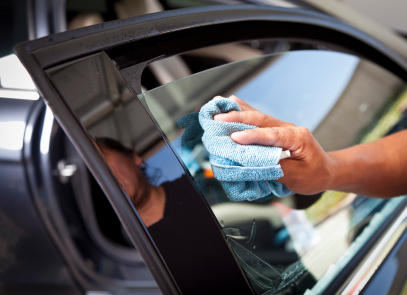
T&S Auto Glass Offers Power Window Repair in Phoenix

T&S Auto Glass Offers power window repair in Phoenix, Chandler and other areas. When your power window requires replacing the professionals at T&S Auto Glass are here to help you with their top quality service. Call us today to schedule an appointment! We also offer side window replacement.

Windshield Chips Repair Costs 2026
Written by craig braddick

Windshield Chips Repair Costs 2025

Repairing a chipped windshield promptly is crucial to prevent further damage and ensure driving safety. The cost of repairing a windshield chip in 2025 varies based on factors such as the size and location of the chip, the type of vehicle, and the service provider. Here’s a breakdown of the typical costs:

Average Repair Costs:

  • Small Chips or Cracks (up to a half-dollar size): Repairing minor chips or cracks typically costs between $20 and $60.
  • Larger Cracks (up to a foot long): For more extensive damage, repair costs range from $50 to $70.
  • Multiple Cracks or Extensive Damage: If your windshield has multiple cracks or significant damage, the repair costs can be higher, and in some cases, replacement might be more cost-effective.

DIY Repair Kits:

For minor chips, DIY repair kits are available and typically cost around $10 to $20. While these kits can be a temporary solution, professional repair is recommended to ensure the structural integrity of the windshield.

Insurance Considerations:

Many insurance policies cover windshield chip repairs, often with little to no out-of-pocket cost to the policyholder. It’s advisable to check with your insurance provider to understand your coverage and any potential impact on your premiums.

Conclusion:

Addressing windshield chips promptly can prevent more extensive damage and higher costs down the line. Consult with a professional auto glass service to assess the damage and determine the most appropriate course of action.

Repairing a Chipped Vehicle Windshield

Repairing a chipped windshield is a cost-effective and quick way to prevent further damage and maintain visibility while driving. Here’s what you need to know:


When Should You Repair a Windshield Chip?

✅ The chip is smaller than a quarter
✅ It’s not in the driver’s direct line of sight
✅ The damage is not at the windshield edges
✅ The crack is not spreading

If the chip is too large or the crack is growing, a full windshield replacement may be necessary.


DIY vs. Professional Repair

🔹 DIY Repair Kits ($10–$20)

  • Best for small chips
  • Includes resin, applicator, and curing tools
  • Can improve appearance but may not restore full strength

🔹 Professional Repair ($50–$70)

  • Uses specialized resin and vacuum technology
  • Restores structural integrity and clarity
  • Takes about 30 minutes

Many insurance companies cover chip repairs for free under comprehensive policies to avoid a full replacement.


How the Repair Process Works

1️⃣ Cleaning – The technician removes debris and moisture from the chip.
2️⃣ Resin Application – A special resin is injected into the damaged area.
3️⃣ Curing – UV light is used to harden the resin.
4️⃣ Polishing – The surface is smoothed for clarity.


Final Thoughts

  • Fix a chip ASAP to prevent cracks from spreading.
  • Check insurance coverage—many providers offer free repairs.
  • Consider professional repair if safety or visibility is a concern.

Do I Repair or Replace my Chipped Windshield?

Deciding whether to repair or replace a chipped windshield depends on several factors, including the size, depth, and location of the damage. Here’s a quick guide to help you make the best choice:


When to Repair Your Windshield

Chip is smaller than a quarter or a crack is under three inches
Not in the driver’s direct line of sight (repairs can cause slight distortion)
Damage is not at the edges (edge cracks weaken the entire windshield)
Chip is shallow and hasn’t penetrated the inner layer

🔹 Cost: $50–$70 for professional repair (often covered by insurance)
🔹 Time: Takes about 30 minutes

💡 Tip: Small chips can spread quickly due to temperature changes, road vibrations, or moisture, so repair ASAP to avoid a full replacement.


When to Replace Your Windshield

Chip is larger than a quarter or a crack is over six inches
Crack has spread or branched out (especially long spiderweb cracks)
Damage is in the driver’s line of sight (repairs may cause distortions)
Chip is deep, reaching both inner and outer glass layers
Damage is near the edges, compromising the windshield’s structural integrity

🔹 Cost: $200–$500 for standard vehicles, $800+ for windshields with ADAS sensors
🔹 Time: Usually 1–2 hours

💡 Tip: Many comprehensive insurance policies cover zero-deductible windshield replacement in states like Arizona, Florida, and Kentucky. Check with your insurer before paying out of pocket.


Final Recommendation

  • If the chip is small and doesn’t affect visibility?Repair
  • If the crack is spreading, deep, or obstructing your vision?Replace

Advantages of Windshield Chip Repair

Repairing a windshield chip as soon as possible has several advantages, saving you money, time, and safety risks. Here’s why you should prioritize a quick repair:


1️⃣ Cost-Effective

Cheaper than replacement – A repair typically costs $50–$70, while a full replacement can range from $200 to $1,000+ (especially for cars with ADAS sensors).
Often covered by insurance – Many comprehensive insurance policies cover chip repairs with zero out-of-pocket costs to prevent larger claims for replacements.


2️⃣ Prevents Further Damage

Chips can spread into long cracks due to temperature changes, road vibrations, and moisture.
✅ A quick repair strengthens the glass, stopping cracks from expanding and avoiding a costly replacement later.


3️⃣ Quick & Convenient

✅ Takes only 30 minutes compared to a 2-hour replacement.
✅ No need to remove and reinstall the entire windshield.
✅ Mobile repair services can fix it at your home or office.


4️⃣ Maintains Structural Integrity

✅ The windshield supports up to 45% of the car’s structural strength in a front-end collision.
✅ A chip weakens the glass, and a repair restores durability, preventing it from shattering under pressure.


5️⃣ Preserves Visibility & Safety

✅ A damaged windshield can cause glare, distortions, or obstructions in your field of view.
✅ A properly repaired chip ensures clear visibility and safer driving conditions.


Final Thoughts

Repair ASAP to avoid larger problems! If your chip is smaller than a quarter and not in your direct line of sight, a quick repair is the best option. If you wait too long, the chip may expand, requiring a costly replacement.

T&S Auto Glass Offers Windshield Chip Repair in Chandler

For auto windshield chip repair in Chandler, call us today to schedule an appointment! We also offer windshield replacement.

Zero Deductible WindsZero Deductible Windshield Replacement Arizona 2025
Written by craig braddick

Zero Deductible Windshield Replacement Arizona 2025

In Arizona, drivers with comprehensive auto insurance policies can benefit from a zero-deductible windshield replacement. This means that if your windshield is damaged, your insurance will cover the full cost of repair or replacement without requiring you to pay a deductible. This policy encourages prompt repairs, enhancing road safety by ensuring clear visibility.

It’s important to note that while Arizona law mandates that insurers offer this zero-deductible option, it’s only applicable if you have comprehensive coverage. Drivers with liability-only insurance policies are not eligible for this benefit.

However, it’s worth noting that frequent windshield claims can impact your insurance premiums. With advancements in vehicle technology, windshield replacements have become more costly, leading some insurers to adjust their policies and rates accordingly. Therefore, it’s advisable to consult with your insurance provider to understand how glass claims might affect your premiums.

Given the prevalence of windshield damage in Arizona due to factors like road debris and extreme temperatures, having comprehensive coverage with a zero-deductible option can be a valuable investment for maintaining both safety and financial peace of mind.

Is Zero Deductible Windshield Insurance Worth It?

Whether zero-deductible windshield insurance is worth it depends on several factors, including your location, driving habits, and the likelihood of windshield damage. Here’s a breakdown of the pros and cons to help you decide:

Pros of Zero Deductible Windshield Insurance:

No Out-of-Pocket Costs: If your windshield gets cracked or shattered, you won’t have to pay anything for the repair or replacement. This can save you hundreds of dollars.
Frequent Windshield Damage in Certain Areas: In places like Arizona, where road debris and extreme temperatures cause frequent windshield damage, this coverage can be very useful.
Convenience & Safety: A damaged windshield can obstruct visibility and compromise vehicle safety. Zero-deductible coverage encourages timely repairs, reducing risks.
Preserves Comprehensive Coverage Benefits: Without this coverage, you’d have to pay your comprehensive deductible, which can be expensive.

Cons of Zero Deductible Windshield Insurance:

Higher Insurance Premiums: Some insurers may increase your comprehensive coverage cost if you frequently file glass claims.
Not Always Cost-Effective: If you rarely experience windshield damage, you might end up paying more in higher premiums than you would for occasional repairs.
Limited to Comprehensive Coverage Holders: If you have only liability coverage, this option is not available.

Is It Worth It?

  • YES, if you drive frequently in areas with gravel roads, construction zones, or extreme weather (like Arizona).
  • YES, if your windshield has advanced technology (HUD displays, rain sensors, cameras) that makes replacements more expensive.
  • MAYBE NOT, if you rarely get windshield damage or have a high-risk insurance policy that could see increased rates.

Final Tip:

Check with your insurance provider about the potential impact on premiums and claim frequency policies before adding zero-deductible windshield coverage. If you’re in Arizona, where insurers are required to offer this option, it’s often a great investment.

If you are looking for windshield replacement in Tempe, Arizona, look no further than TS Auto Glass. Call Today – (480) 345-8990 

Replacing a Rear Windshield
Written by craig braddick

Replacing a Rear Windshield

Replacing a car trunk window (rear windshield or rear hatch glass) requires specialized tools and techniques to ensure a secure and watertight installation. Here’s a step-by-step guide and considerations for DIY replacement or professional help:

  1. Extensive Damage: If your windshield has significant damage, such as large cracks, deep chips, or extensive spiderwebbing, replacement may be necessary. Damage that obstructs the driver’s view or compromises the structural integrity of the windshield warrants immediate replacement.
  2. Damage in the Driver’s Line of Sight: Cracks or chips that are directly in the driver’s line of sight can impair visibility and pose a safety hazard. Even if the damage seems minor, it can cause distracting glare or distortions, making it difficult to see the road clearly.
  3. Damage Near the Edges: Chips or cracks near the edges of the windshield can weaken the structural integrity of the glass. Since the edges play a crucial role in supporting the windshield and maintaining its seal, any damage in this area can compromise the integrity of the entire windshield.
  4. Multiple Chips or Cracks: If your windshield has multiple chips or cracks, especially if they are close together or intersecting, it may be more cost-effective to replace the windshield rather than attempting repairs. Multiple repairs can weaken the glass and may not provide adequate protection.
  5. Failed Repair Attempts: If you’ve attempted to repair damage to your windshield using a DIY repair kit or professional repair service but the repair has failed or the damage has worsened, replacement may be necessary.
  6. Age and Wear: Over time, windshields can become worn, pitted, or scratched, which can affect visibility and reduce the structural integrity of the glass. If your windshield is old or showing signs of wear, it may be time to consider replacement for safety reasons.
  7. Safety Concerns: Modern windshields are designed as a critical safety component of your vehicle, providing structural support and protecting occupants in the event of a collision. If your windshield is compromised in any way, it may not provide adequate protection in the event of an accident, putting you and your passengers at risk.
  8. Regulatory Compliance: In some jurisdictions, there are regulations regarding the condition of vehicle windshields. If your windshield damage violates these regulations, you may be required to replace it to ensure compliance with local laws.

It’s essential to address windshield damage promptly to ensure your safety and the structural integrity of your vehicle. If you’re unsure whether your windshield needs repair or replacement, consult with a qualified auto glass professional for an assessment.

1. Decide: DIY or Professional Replacement

  • DIY Replacement:
    • Cost-effective if you have the necessary tools and skills.
    • Best for older vehicles or simple glass installations.
  • Professional Replacement:
    • Necessary if your car has advanced features like defrosters, antennas, or embedded sensors in the glass.
    • Ensures proper installation and prevents leaks or rattling.

2. Gather Tools and Materials

For a DIY project, you’ll need:

  • Replacement Glass: Ensure it’s the correct size and model for your vehicle.
  • Urethane Adhesive: Automotive-grade adhesive for securing the window.
  • Caulk Gun: To apply the adhesive.
  • Glass Cleaner and Primer: Prepares the surface for a strong bond.
  • Gloves: Protects your hands from broken glass.
  • Trim Removal Tool: To remove the old window’s moldings.
  • Utility Knife or Razor Blade: To cut away old adhesive.
  • Suction Cups (Optional): To lift and position the new glass safely.

3. Prepare for Removal

  1. Ensure Safety:
    • Wear gloves and protective eyewear.
    • Work in a well-ventilated area or outdoors.
  2. Remove Broken Glass:
    • If the old window is shattered, carefully remove all glass shards using a vacuum or scraper.
  3. Detach Interior Panels:
    • Remove any trim or panels that block access to the window frame.
  4. Cut Away Old Adhesive:
    • Use a utility knife to remove as much of the old urethane adhesive as possible.

4. Install the New Glass

  1. Clean and Prime the Surface:
    • Use a glass cleaner to remove debris. Apply a primer to the window frame for better adhesion.
  2. Apply Urethane Adhesive:
    • Load the adhesive into a caulk gun and apply a continuous bead around the window frame.
  3. Position the New Glass:
    • Use suction cups to lift and align the new glass. Press it firmly into place.
  4. Secure and Let It Cure:
    • Use painter’s tape to hold the window in place while the adhesive cures.
    • Follow the adhesive manufacturer’s instructions for curing time (usually 24–48 hours).

5. Reassemble and Test

  1. Reinstall Trim and Panels:
    • Replace any removed interior or exterior trim pieces.
  2. Check for Leaks:
    • After the adhesive has cured, spray water around the edges of the window to ensure there are no leaks.
  3. Reconnect Features:
    • If your window has a defroster or antenna, ensure all connections are properly reattached.

When to Hire a Professional

  • Advanced Features: Heated windows, embedded antennas, or proximity sensors.
  • Insurance Coverage: Many auto insurance policies cover glass replacement, reducing out-of-pocket costs.
  • Warranty: Professional services often provide warranties on their work.

Costs

  • DIY: $100–$300 (replacement glass and materials).
  • Professional Replacement: $200–$800 depending on the car model and features.

T&S Auto Glass Offers Replacement Windshields in Chandler

When you’re looking for the best windshield repair & replacement in Phoenix, T&S Auto Glass is here to help!  We offer mobile windshield repair anywhere in the Phoenix Valley for your convenience and at our shop in Chandler, AZ.  If you’ve got a cracked windshield, chipped windshield, or need any other type of auto glass repair service call our friendly and professional team.

What Are the Main Reasons Windshields Need Replacing?
Written by craig braddick

Why Is My Windshield Rattling?

A rattling windshield can be caused by several issues. Here’s a breakdown of common causes and how to address them:

1. Loose Windshield or Poor Installation

  • Cause: The adhesive or sealant holding the windshield in place may have deteriorated, or the windshield wasn’t installed correctly.
  • Symptoms: The rattle intensifies when driving over bumps or at high speeds.
  • Solution:
    • Inspect the seal around the windshield.
    • If it looks damaged, take the vehicle to a professional for resealing or reinstalling the windshield.

2. Worn Weatherstripping or Gasket

  • Cause: The rubber weatherstripping around the windshield may be loose, cracked, or missing.
  • Symptoms: The rattle may be more pronounced in windy conditions or when the car vibrates.
  • Solution:
    • Check the condition of the weatherstripping.
    • Replace damaged or loose gaskets. You can purchase a replacement kit or have it repaired professionally.

3. Loose or Missing Clips or Fasteners

  • Cause: Windshield trim or clips securing the windshield might be loose or broken.
  • Symptoms: The rattle comes from the edges of the windshield.
  • Solution:
    • Inspect the trim and clips.
    • Replace broken or missing clips. This is often a simple fix that you can do yourself.

4. Structural Issues in the Vehicle Frame

  • Cause: Damage to the frame or body of the vehicle near the windshield can cause movement or gaps.
  • Symptoms: The rattle may coincide with visible gaps or misalignment near the windshield.
  • Solution:
    • Have a mechanic inspect for structural issues, especially if the car has been in an accident.

5. Debris in the Seal

  • Cause: Dirt, leaves, or debris caught between the windshield and the frame can create gaps and vibrations.
  • Symptoms: The rattle may worsen after driving through debris or in windy conditions.
  • Solution:
    • Clean the area around the windshield thoroughly with a brush or compressed air.

6. Loose Interior Components

  • Cause: Interior components near the windshield, like the dashboard or sun visor, might be the source of the noise.
  • Symptoms: The rattle seems to come from inside the car, especially near the dashboard.
  • Solution:
    • Check and tighten any loose screws or panels on the dashboard or interior trim.

7. Temperature or Environmental Factors

  • Cause: Extreme temperature changes can cause the windshield or its components to expand and contract, loosening the seal.
  • Symptoms: The rattle is seasonal or occurs after rapid temperature changes.
  • Solution:
    • If the seal appears intact, monitor the situation. For persistent issues, resealing may be required.

8. Windshield Damage

  • Cause: Cracks or chips in the windshield can cause vibrations and rattling.
  • Symptoms: Visible damage on the windshield, often accompanied by the noise.
  • Solution:
    • Repair chips or cracks promptly. If the damage is extensive, the windshield may need replacement.

Here’s how to inspect and address the potential causes of your rattling windshield step by step. You can do many of these checks yourself before seeking professional help.


Inspection Steps

1. Check the Windshield Seal

  • What to Look For:
    • Gaps or looseness between the windshield and the car’s frame.
    • Signs of dried-out or cracked sealant.
  • How to Inspect:
    • Run your fingers along the edge of the windshield.
    • Gently push the glass; if it moves, the seal may be compromised.

2. Inspect the Weatherstripping

  • What to Look For:
    • Torn, cracked, or missing rubber around the windshield.
  • How to Inspect:
    • Look closely at the rubber weatherstripping.
    • Use a flashlight to check for gaps or damage.

3. Examine the Trim and Clips

  • What to Look For:
    • Loose, bent, or missing trim pieces around the windshield.
    • Loose clips holding the trim in place.
  • How to Inspect:
    • Tap gently on the trim; a rattling sound may indicate loose parts.

4. Check for Debris

  • What to Look For:
    • Leaves, dirt, or small objects trapped between the windshield and the frame.
  • How to Inspect:
    • Use a small brush or compressed air to clear debris.

5. Test for Interior Rattles

  • What to Look For:
    • Loose dashboard panels or other components vibrating near the windshield.
  • How to Inspect:
    • Drive on a bumpy road and press on dashboard panels or trim pieces to see if the rattle changes.

6. Inspect for Structural Issues or Damage

  • What to Look For:
    • Warping or visible damage to the car’s frame around the windshield.
  • How to Inspect:
    • Look for misalignment or signs of rust or bending near the windshield edges.

7. Check for Windshield Damage

  • What to Look For:
    • Chips or cracks in the windshield itself.
  • How to Inspect:
    • Shine a light across the windshield at an angle to reveal small cracks or chips.

DIY Fixes for Common Issues

1. Resealing the Windshield

  • Use a urethane-based windshield sealant (available at auto parts stores).
  • Apply the sealant in any visible gaps along the windshield edges.

2. Replace Weatherstripping

  • Purchase a universal weatherstripping kit if the original is damaged.
  • Remove old weatherstripping, clean the surface, and attach the new rubber strip.

3. Tighten or Replace Trim Clips

  • Remove and inspect the trim. If clips are loose or broken, replace them with new ones.
  • Ensure the trim is securely snapped back into place.

4. Clean and Clear Debris

  • Use a small brush or vacuum to remove dirt. Compressed air can help for hard-to-reach areas.

5. Temporary Interior Fixes

  • Use adhesive foam strips to cushion any loose dashboard or trim components.

When to Seek Professional Help

  1. If the Windshield Moves When Pushed:
    • Movement indicates the seal is compromised, and the windshield may need professional resealing or replacement.
  2. If Damage Is Found:
    • Chips or cracks larger than a quarter inch should be repaired or replaced by a professional.
  3. Persistent Rattling After DIY Fixes:
    • If the noise persists, take the car to an auto glass specialist or mechanic.

T&S Auto Glass Offers Replacement Sunroofs and Moonroofs in Chandler

When you’re looking for the best windshield repair & replacement in Phoenix, T&S Auto Glass is here to help!  We offer mobile windshield repair anywhere in the Phoenix Valley for your convenience and at our shop in Chandler, AZ.  If you’ve got a cracked windshield, chipped windshield, or need any other type of auto glass repair service call our friendly and professional team.

How To Fix A Leaking Windshield
Written by craig braddick

Fixing A Leaky Windshield

How To Fix A Leaking Windshield

Windshield leaks can often be repaired without needing a full windshield replacement, especially if they are minor and caught early. Here’s how to address a windshield leak:

1. Identify the Leak Source

  • Water Test: Pour water over the windshield edges and check from the inside for any water seeping through. Have someone sit inside the car to observe, or look for moisture yourself.
  • Inspect the Seal: Sometimes the leak is due to a broken or worn-out seal around the windshield. Look for cracks or gaps in the sealant.

2. Clean the Area Around the Leak

  • Clean around the leaky area on the windshield’s exterior to ensure the adhesive or sealant will bond well. Remove any dirt, old adhesive, or other debris with a non-abrasive cleaner.

3. Use Windshield Sealant or Silicone Caulk

  • Windshield Sealant: You can use a clear, flowable windshield sealant, typically available at auto parts stores. Apply it to the gap or crack around the windshield edge. This type of sealant is designed specifically to fill small gaps and cracks.
  • Silicone Caulk: In some cases, automotive-grade silicone caulk can be applied to the leaky area. Just be cautious with the application, as this product is more permanent and can be harder to remove later.

4. Apply and Smooth the Sealant

  • Carefully apply the sealant to the affected area using a caulk gun or applicator. Smooth it with a gloved finger or tool to ensure a tight seal, and let it cure according to the product’s instructions (typically 24 hours).

5. Test for Leaks Again

  • Once the sealant is fully cured, repeat the water test to check for any remaining leaks. If water still seeps through, the leak may be in another area, or the adhesive application might need reinforcement.

If the leak persists despite these steps, it’s possible the entire seal is compromised, which may require a professional to remove and reseal or replace the windshield entirely.

hips, cracks, or damage to the windshield promptly. Regularly inspect the windshield and surrounding seals for signs of wear or damage, and address any issues promptly to prevent leaks from occurring.

Windshield Leak Repair

If you live or work in the Chandler, Tempe, or anywhere in the Phoenix Valley and have a leaky windshield we can help!  Leaking windows are annoying and it also can ding the value of a vehicle if the interior is ruined by mold or rust. Preserve the value of your car, truck, or suv by allowing T&S Auto Glass to provide reliable leaky windshield repair. To find out more about our windshield repair services or schedule an appointment please give us a call today! Schedule Windshield Leak Repair Today 480-345-0990 /602-667-3030 /623-878-5566

Removing Dry Mud From Car Windows
Written by craig braddick

Is Windshield Tape Needed?

Yes, windshield tape can be important if you’ve recently had a windshield replacement. The tape, typically applied around the edges of the windshield, helps hold it in place and prevents it from shifting or coming loose before the adhesive fully cures. Here’s why it can be essential:

1. Stabilizes the Windshield During Curing

  • Windshield adhesives need time to fully cure, typically 24–48 hours, depending on the adhesive type and weather conditions. The tape holds the windshield securely, minimizing any movement that might affect the seal.

2. Prevents Air and Water Leaks

  • Properly securing the windshield prevents gaps and ensures that the adhesive forms a tight seal. Without tape, even a minor shift could create leaks, allowing air or water to enter the vehicle.

3. Protects Against Road Vibrations and Impact

  • Driving over rough surfaces or uneven roads can cause vibrations that may shift the windshield slightly if it’s not fully set. The tape helps absorb some of these vibrations, preventing the windshield from moving.

Tips for Using Windshield Tape:

  • Leave It On for 24–48 Hours: Don’t remove the tape prematurely to allow for complete curing.
  • Avoid Car Washes and Excessive Pressure: High-pressure water or strong winds can disturb the curing adhesive.
  • Be Gentle with Your Car Doors: Slamming doors can cause vibrations that may disrupt the adhesive setting.

Hotter Weather Vs Cold Conditions

When it comes to weather in Arizona, typically it is dry weather. Usually In good safe conditions to have the adhesive settle quicker than usual. Although play it safe and wait up to at least 24 hours.

In the situation where you are in colder climates typically wait upwards to around 72 hours for the adhesive to settle on your windshield. This is an important part of the process of getting your new windshield installed. Patience is a virtue so just wait and the adhesive will settle properly in the allotted time.

Avoid Having A Car Wash

While tape is still actively working its magic on your vehicle, do not take your vehicle through a car wash. Especially higher pressured car washes, these tend to cause more damage than good during this process. This will be due to the high-pressure washing system to force your glue to peel off or away which in short makes you head back to your shop to have the problem resolved yet again. On the other hand, you can easily choose to manually wash your car, and this shouldn’t cause any damages to your vehicle.


What Are the Main Reasons Windshields Need Replacing?
Written by craig braddick

Why Do Windshields Get Pitted?

Windshields can become pitted due to various factors, often related to exposure and impact. Here’s a detailed look at why this happens:

. Debris Impact

  • Road Debris: Small rocks, gravel, and other debris kicked up by vehicles can hit the windshield at high speeds. Over time, repeated impacts can cause small pits or dings on the glass surface.
  • Sand and Dust: In areas with frequent sandstorms or high winds, sand and dust particles can cause abrasion on the windshield, leading to pitting.

2. Environmental Factors

  • UV Exposure: Prolonged exposure to sunlight can degrade the windshield’s surface over time, making it more susceptible to damage.
  • Extreme Temperatures: Fluctuations between extreme hot and cold temperatures can cause the glass to expand and contract. This can make the windshield more prone to cracking and pitting.

3. Wiper Blades

  • Worn Wipers: Old or damaged wiper blades can become abrasive and scratch the surface of the windshield, leading to pitting over time.
  • Debris on Wipers: Small particles trapped between the wiper blades and the windshield can also cause scratches and pits.

4. Chemical Exposure

  • Acid Rain: Rain that contains pollutants can be corrosive to the windshield, leading to surface damage and pitting.
  • Cleaning Products: Some harsh cleaning products can degrade the glass over time, making it more susceptible to pitting.

5. Wear and Tear

  • Age of the Windshield: Older windshields can naturally become more vulnerable to damage as the glass surface wears down over time.
  • Regular Use: Frequent use and exposure to the elements can lead to gradual pitting.

6. Improper Maintenance

  • Improper Cleaning: Using abrasive cleaning materials or techniques can scratch and pit the windshield surface.
  • Neglecting Repairs: Small chips or cracks that are left untreated can worsen and contribute to overall windshield degradation, including pitting.

Preventive Measures

  • Regular Cleaning: Use non-abrasive cleaners and soft cloths to clean your windshield. Avoid using harsh chemicals or scrubbing aggressively.
  • Wiper Maintenance: Replace wiper blades regularly and ensure they are in good condition. Clean the windshield and wipers frequently to remove debris.
  • Protective Measures: In areas prone to road debris, consider using windshield protectors or films to reduce impact damage.

Addressing minor damage early can help prevent further issues and preserve the condition of your windshield.

T&S Auto Glass Offers Replacement Sunroofs and Moonroofs in Chandler

When you’re looking for the best windshield repair & replacement in Phoenix, T&S Auto Glass is here to help!  We offer mobile windshield repair anywhere in the Phoenix Valley for your convenience and at our shop in Chandler, AZ.  If you’ve got a cracked windshield, chipped windshield, or need any other type of auto glass repair service call our friendly and professional team.

Sunroof Glass Replacement Costs 2025
Written by craig braddick

Adding a Moonroof To A Car

Yes, it is possible to add a moonroof (also known as a sunroof) to a car, but it involves several considerations and steps:

1. Consult a Professional

  • Choose a Reputable Installer: It’s crucial to work with a professional who specializes in installing moonroofs. This ensures that the installation is done correctly and safely.
  • Compatibility Check: The installer will need to check if your car model is compatible with aftermarket moonroof installation. Some cars may have structural or design constraints that make installation more challenging.

2. Types of Moonroofs

  • Pop-Up: Simple, manual operation; less common for aftermarket installations.
  • Sliding: The most common type; opens by sliding back into the roof.
  • Panoramic: Large, often covering a significant portion of the roof; typically more complex to install.

3. Installation Process

  • Cutting the Roof: The installer will need to cut an opening in the roof of your vehicle. This process requires precision to avoid damaging the car’s structure or existing features.
  • Installing the Frame: A frame or mounting system is installed to hold the moonroof in place. This frame needs to be sealed properly to prevent leaks.
  • Fitting the Glass: The moonroof glass or panel is installed into the frame. It must be aligned and sealed correctly.
  • Electrical Work: If your moonroof has electrical controls (e.g., for automatic opening/closing), the installer will need to connect these to your vehicle’s electrical system.

4. Considerations

  • Warranty Impact: Adding a moonroof could affect your car’s warranty, especially if the installation is done by a third party. Check with your car manufacturer or dealer.
  • Resale Value: Consider how adding a moonroof might impact the resale value of your car. While some buyers may see it as a desirable feature, others might view it as a modification that affects the car’s originality.
  • Cost: The cost of adding a moonroof varies based on the type of moonroof and your vehicle. On average, it can range from $1,000 to $3,000 or more. This includes the cost of the moonroof unit and installation labor.

5. Maintenance

  • Regular Inspection: After installation, have the moonroof checked regularly for leaks or any operational issues.
  • Cleaning: Clean the moonroof glass and surrounding areas to maintain clarity and functionality.

Adding a moonroof can enhance the comfort and appeal of your car, but it’s important to ensure that the installation is done properly to avoid potential issues.

Sunroof and Moonroof Repair & Replacement In Phoenix & Chandler

If you have a damaged sunroof or moonroof T&S Auto Glass can help you fix it for little to no cost to you.  Arizona drivers that have full coverage car insurance many times are able to get free sunroof and moonroof replacement.  It’s easy to schedule a time to come to our shop for repair or we offer mobile windshield repair in Chandler or anywhere in the Phoenix Valley.  When you have a damaged sunroof or moonroof trust the pros at T&S Auto Glass.

Removing Dry Mud From Car Windows
Written by craig braddick

Removing Dry Mud From Car Windows

Removing dry mud from car windows requires some care to avoid scratching the glass. Here’s a step-by-step guide to effectively and safely clean your car windows:

Materials Needed

  • Soft-bristled brush or microfiber cloth
  • Car-safe glass cleaner
  • Water hose or spray bottle
  • Bucket of warm water
  • Mild car shampoo or dish soap
  • Squeegee
  • Towels or drying cloths

Steps to Remove Dry Mud

1. Initial Rinse

  • Use a hose or spray bottle to rinse off as much dry mud as possible from the windows. The goal is to soften the mud and remove loose particles without rubbing them into the glass.

2. Soak and Loosen the Mud

  • Fill a bucket with warm water and add a few drops of mild car shampoo or dish soap.
  • Soak a soft-bristled brush or microfiber cloth in the soapy water.
  • Gently apply the soapy water to the muddy areas on the windows, allowing it to sit for a few minutes to soften the mud further.

3. Gently Wipe Away the Mud

  • Use the soaked brush or cloth to gently wipe away the mud. Start from the top of the window and work your way down.
  • Avoid applying too much pressure to prevent scratching the glass.

4. Rinse Again

  • Rinse the windows thoroughly with clean water to remove any remaining mud and soap residue.

5. Apply Glass Cleaner

  • Spray a car-safe glass cleaner onto the windows.
  • Wipe the windows with a clean microfiber cloth or a squeegee to remove any streaks and achieve a clear finish.

6. Dry the Windows

  • Use a clean towel or drying cloth to dry the windows completely, ensuring no water spots are left behind.

Tips for Preventing Scratches

  • Always use soft materials like microfiber cloths or soft-bristled brushes when cleaning car windows.
  • Avoid using abrasive cleaners or rough sponges, as these can scratch the glass.
  • If the mud is particularly stubborn, repeat the soaking and wiping process rather than scrubbing harder.

By following these steps, you can effectively remove dry mud from your car windows without damaging the glass.

1 2 3 4 10